 Hello everyone
Today we are going to learn, How to Integrate PayPal Payment Gateway Without using any extension or hosting any file on server. We are going to use the Paypal Payment link API method where we need to make three API requests to the Paypal server to process our payment. Don’t worry the method is super simple and you can easily understand it.
Please note that we are going to perform the testing in Sandbox mode. Also, I’m assuming that you already have a sandbox account for testing.
![]() I have made a detailed step-by-step guide available on my website.
I have made a detailed step-by-step guide available on my website.
https://cttricks.com/2021/10/05/intrgrate-paypal-payment-gatway/
Get PayPal Credentials
Visit the Paypal developer dashboard and log in/register to your account. Hereunder REST API apps Create a new app or you can use the older one too. Now choose the app and get the Client ID and Secret . Use the Authorization tool to get the Basic Authorization token .
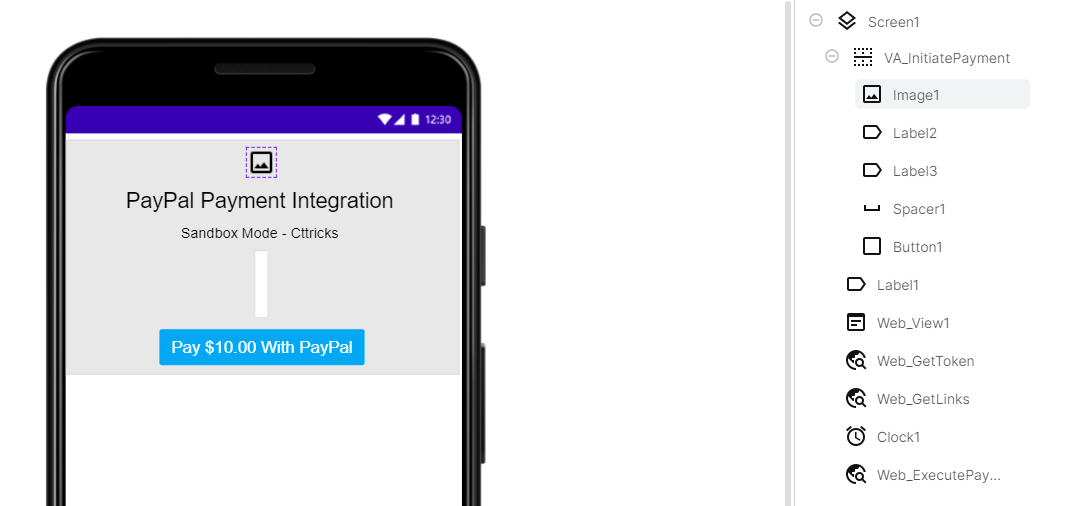
Designer Part
Here we are going to take 3 Web components. 1st to generate an access token. 2nd generate payment links & 3rd to process the payment and verify it.
Also, a web viewer is used to load the payment page so user can access their PayPal account and approve the payment. And a button to initiate the payment process.
Blocks Part
On button click, We have to make an API request to /v1/oauth2/token to generate an access token.
Post Request Body
{"intent": "sale","payer": {"payment_method": "paypal"},"transactions": [{"amount": {"total": "30.00","currency": "USD","details": {}},"invoice_number": "invoice_48787589672","payment_options": {"allowed_payment_method": "INSTANT_FUNDING_SOURCE"},"item_list": {}}],"redirect_urls": {"return_url": "https://redirect-example.com","cancel_url": "https://cancelled-example.com"}}
Post Request URL
- Sendbox Mode:
https://api-m.sandbox.paypal.com - Live Mode:
https://api-m.paypal.com
Steps Explained
Follow blocks from top to bottom,
- Created a global variable for API URL
- On button click, We have to make an API request to /v1/oauth2/token to generate an access token.
- Now we’ll use the generated Authorization Bearer token to make another API request on /v1/payments/payment to generate the payment link.
- Note that the invoice_number must be unique each time.
- From the response, we’ll get the payment id & execute_url and put this in another global variable.
- From the same response, we’ll get approval_url and load this URL in WebViewer.
- Also, we’ll use a clock component to keep checking the current URL of the webpage loading in web viewer.
- Once the user completes the payment process and PayPal redirects the user to either redirect_url or cancel_url that we defined earlier.
- If PayPal redirects the user to redirect_url we’ll simply hide the Web viewer and extract the PayerID from the query parameter of the current URL.
- With this PayerID we’ll make a POST request on execute_url to complete the payment process and get a response.
- From the response (JSON) of this API request, we’ll simply get the state key and check if it is approved.
- If the
state = approvedpayment success else payment failed.
Please note that, if the user cancels the payment. Paypal redirects it to cancel_url which we’ll easily detect as we are checking the current URL of the web viewer at a certain interval and set the status to Payment canceled by the user.
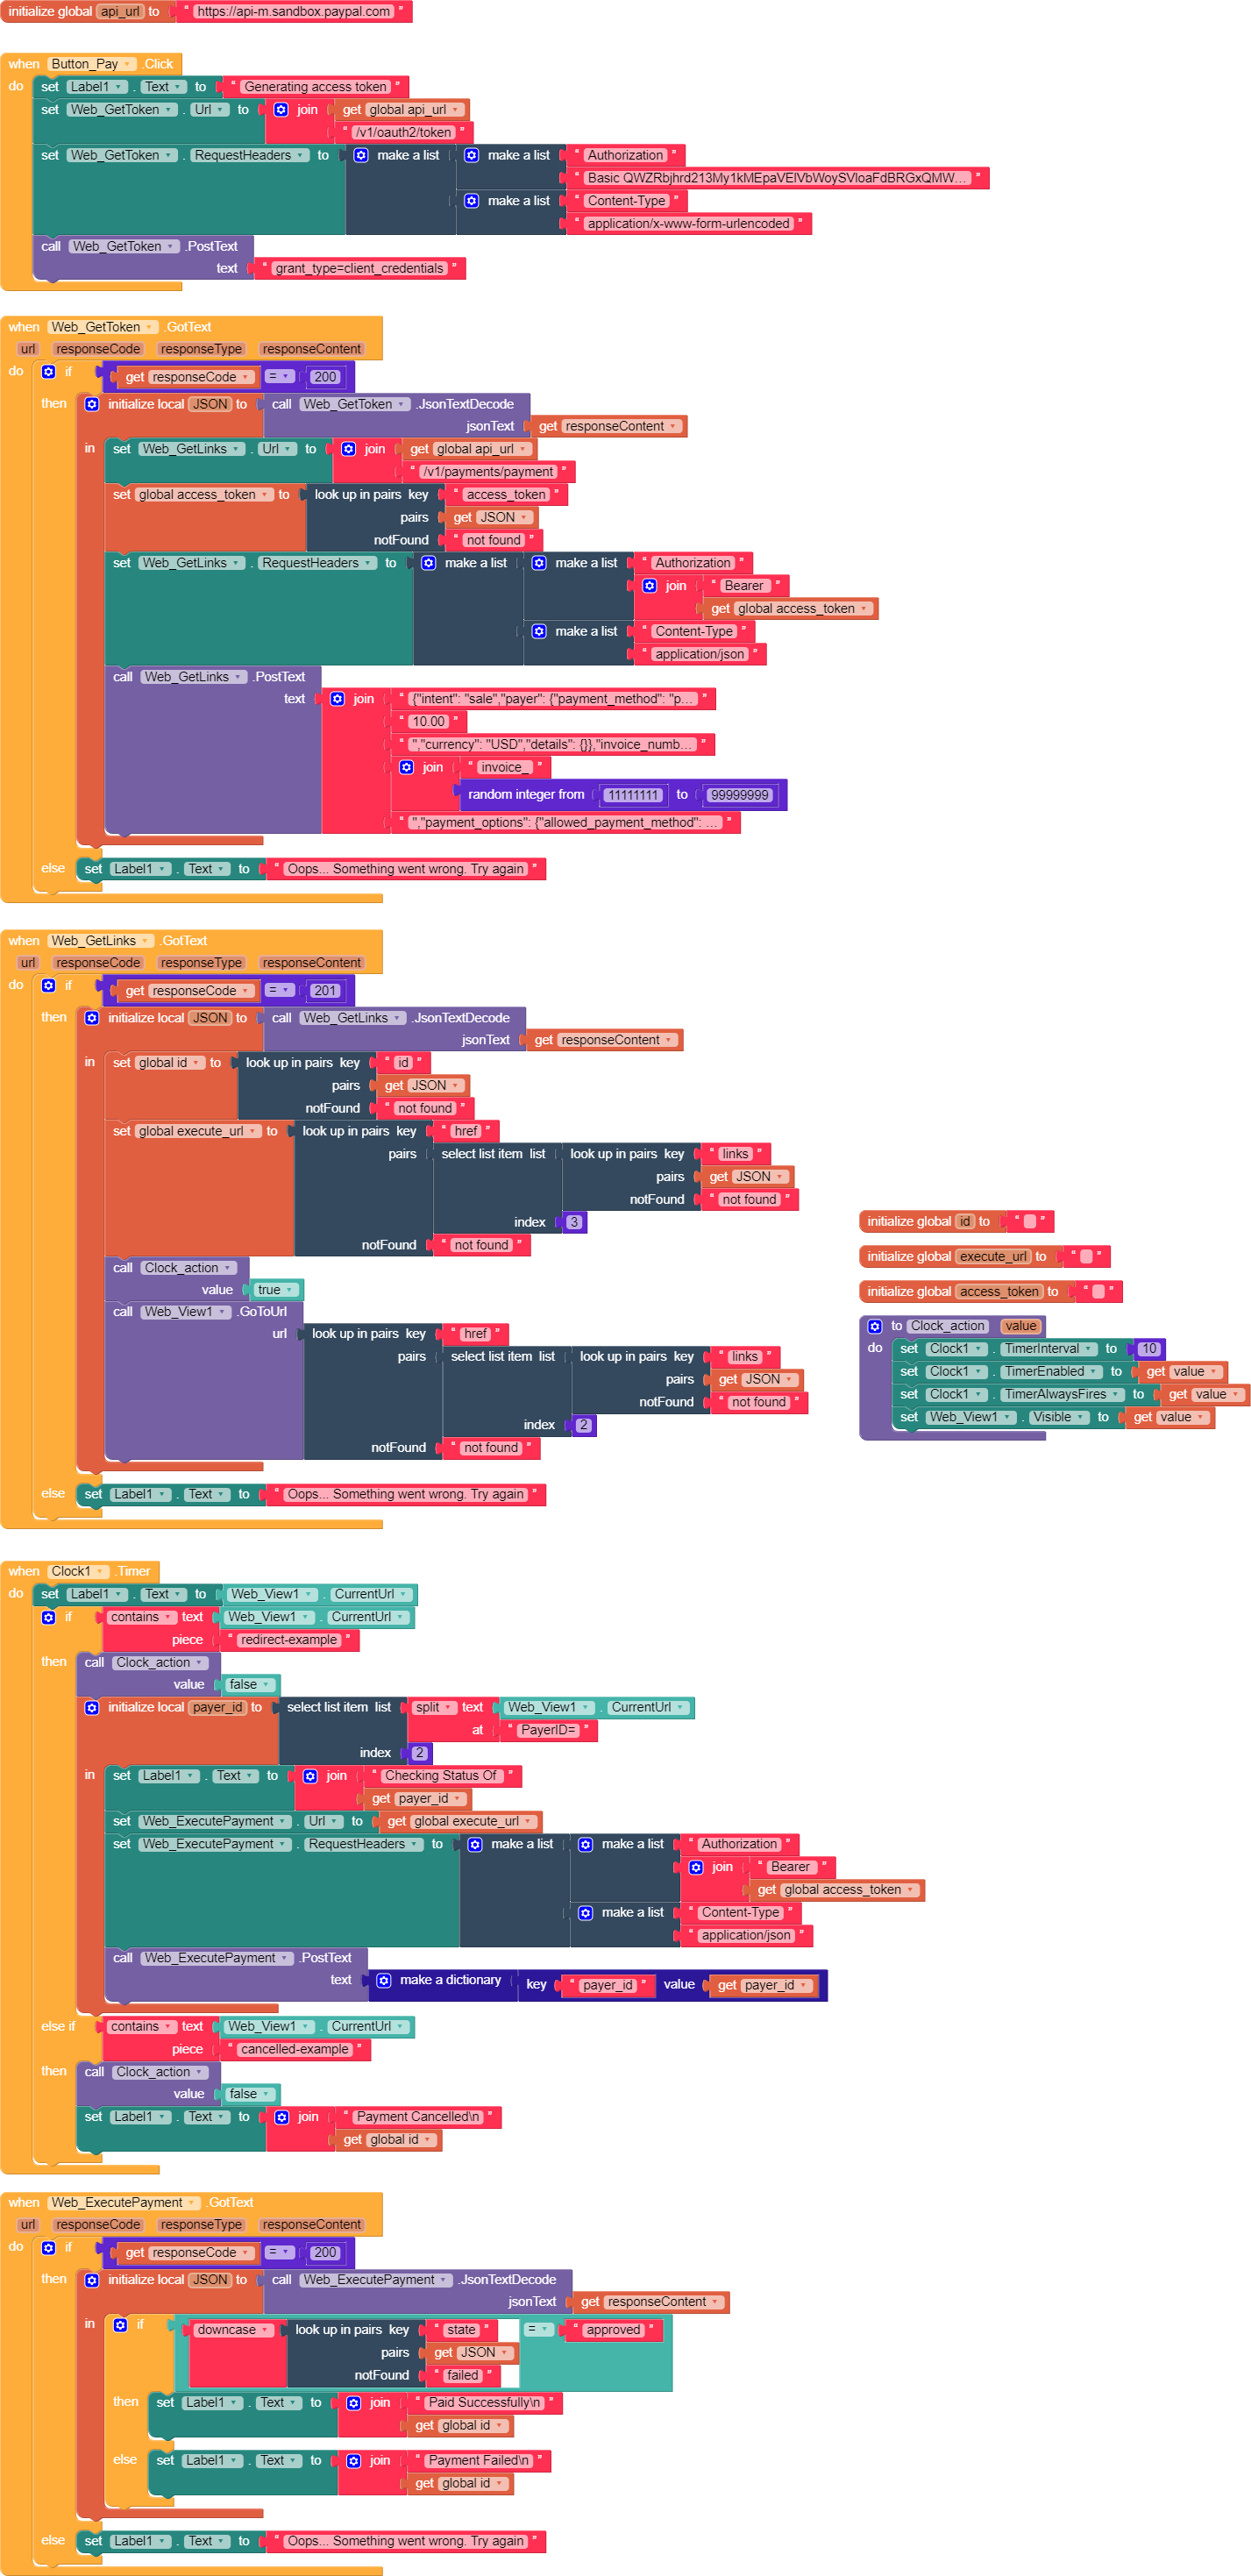
All Blocks Screenshot
The total number of blocks is 182. you can modify blocks to reduce/optimize them.
If you like this guide then do hit ![]() button and if you have any queries or suggestions feel free to comment below.
button and if you have any queries or suggestions feel free to comment below.
![]() Download demo AIA file: Paypal.aia (7.5 KB)
Download demo AIA file: Paypal.aia (7.5 KB)