
Today we are going to learn, How to Integrate Instamojo Payment Gateway Without using any extension or hosting any file on the server. We are going to use the Instamojo Payment link API method where we need to make an API request to the Instamojo server to generate our payment URL. Don’t worry the method is super simple and you can easily understand it.
Please note that we are going to perform the testing in Sandbox mode.
Get Instamojo Credentials
Visit the Instamojo and login/register to your account. Here we can get our API key and Auth token which we use to create API requests for generating a payment link. For more info visit the Instamojo docs page.
API URLs
- Sandbox Mode: https://test.instamojo.com/api/1.1/
- Live Mode: https://www.instamojo.com/api/1.1/payment-requests/
![]() I have made a detailed step-by-step guide available on my website.
I have made a detailed step-by-step guide available on my website.
https://cttricks.com/2021/10/06/instamojo-payment-gateway-integration-guide-ai2builders/
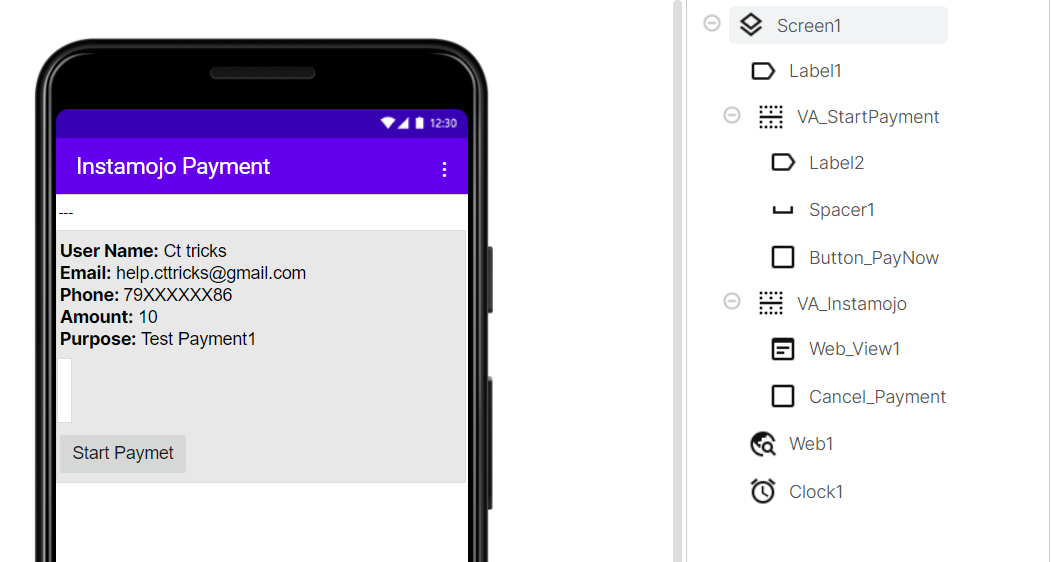
Designer Part
Here we are going to take one web component to make API requests for generating payment link. And Web Viewer to process the payment.
Blocks Part
On button click, We have to make a POST request to sandbox/live URL. Also, according to Instamojo payment request API docs. user/buyer_name , email , phone , amount , and purpose are required. We must have to provide these details.
Steps Explained
Follow blocks from top to bottom,
- First, we need to create few global variables. payment_id , X_Api_Key , and X_Auth_Token .
- Now, On button click, We’ll make a POST request to the Instamojo payment link API
- Please note that there is no need to modify the redirect_url.
- Now from the response of the API call. we’ll simply check if the status is true. If it’s false then there is something wrong with the API request that we have to check and try again.
- If true, then we’ll get the Payment ID and the Long/Payment URL. Here we’ll store the payment id for further use and load the long/payment URL in the web viewer. Also, we’ll hide the vertical arrangement VA_StartPayment and show VA_Instamojo.
- A procedure is used to enable/disable the clock and also added a navigation option in the web viewer to move back to the previous page if needed using the back button.
- Now once the Instamojo redirects users to redirect_url we’ll detect it and hide the VA_Instamojo arrangement.
- Here in the response/redirect URL Instamojo payment_status in query parameters.
- We’ll simply check if
payment_status = Creditmeans the user completed the payment successfully. else payment failed. - Also, we also have a button to Cancel payment then payment which will cancel the payment and hide the VA_Instamojo arrangement.
All Blocks Screenshot
The total number of blocks is 139. Feel free to modify blocks to reduce/optimize them.

![]() Download Demo AIA File: Instamojo-demo.aia (6.4 KB)
Download Demo AIA File: Instamojo-demo.aia (6.4 KB)
Other Payment Gateways Integration Gude
If you like this guide then do hit ![]() button and if you have any queries or suggestions feel free to comment below. For more visit Cttricks.com
button and if you have any queries or suggestions feel free to comment below. For more visit Cttricks.com