Hello! Guys,
Today I’m going to share a guide to use recyclerview component.
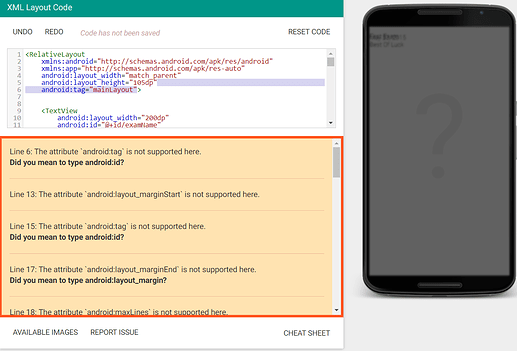
To use this component first you need to create your design with XML. Don’t worry if you don’t know XML then you can use xml code from any site. Many sites provide you free UI with xml, just you need to download the code and edit or preview with this site : https://labs.udacity.com/android-visualizer/
While editing your code you have to add android:tag="id" in every component of the code, replace id with a unique value for every component. Let’s take one example.
<RelativeLayout
    xmlns:android="http://schemas.android.com/apk/res/android"
    xmlns:app="http://schemas.android.com/apk/res-auto"
    android:layout_width="match_parent"
    android:layout_height="105dp"
    android:tag="mainLayout">


    <TextView
        android:layout_width="200dp"
        android:id="@+id/examName"
        android:textSize="16sp"
        android:layout_marginStart="20dp"
        android:text="First Exam"
        android:tag="mainTitle"
        android:textColor="#000"
        android:layout_marginEnd="20dp"
        android:maxLines="1"
        android:layout_marginTop="15dp"
        android:layout_height="wrap_content"/>

    <ImageView
        android:id="@+id/examPic"
        android:layout_width="20dp"
        android:layout_height="20dp"
        android:layout_below="@+id/examName"
        android:tint="#808080"
        android:layout_marginStart="20dp"
        android:layout_marginTop="7dp"
        android:src="@android:drawable/ic_menu_save"/>

    <TextView
        android:id="@+id/examDate"
        android:layout_toEndOf="@+id/examPic"
        android:layout_width="wrap_content"
        android:layout_height="wrap_content"
        android:layout_below="@+id/examName"
        android:layout_marginTop="5dp"
        android:layout_marginEnd="20dp"
        android:layout_marginStart="10dp"
        android:gravity="center"
        android:text="May 23, 2015"
        android:tag="date"
        android:textSize="16sp"/>

    <ImageView
        android:id="@+id/examPic2"
        android:layout_width="20dp"
        android:layout_height="20dp"
        android:layout_below="@+id/examDate"
        android:tint="#808080"
        android:layout_marginStart="20dp"
        android:layout_marginTop="7dp"
        android:src="@android:drawable/ic_menu_save"/>

    <TextView
        android:id="@+id/examMessage"
        android:layout_toEndOf="@+id/examPic2"
        android:layout_width="wrap_content"
        android:layout_height="wrap_content"
        android:layout_below="@+id/examDate"
        android:layout_marginEnd="20dp"
        android:layout_marginTop="5dp"
        android:layout_marginStart="10dp"
        android:gravity="center"
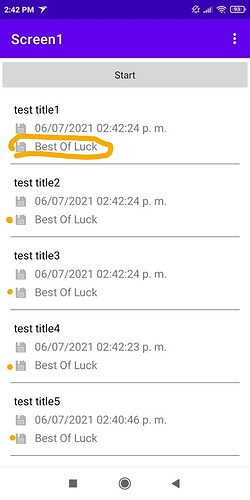
        android:text="Best Of Luck"
        android:tag="caption"
        android:textSize="16sp"/>


    <TextView
        android:id="@+id/border2"
        android:layout_width="match_parent"
        android:layout_height="1dp"
        android:layout_marginStart="15dp"
        android:layout_marginEnd="15dp"
        android:layout_alignParentBottom="true"
        android:background="#808080"/>


</RelativeLayout>
In this code you can find android:tag="id" in every component. This is the ID of your component in the block part you need it.
Blocks
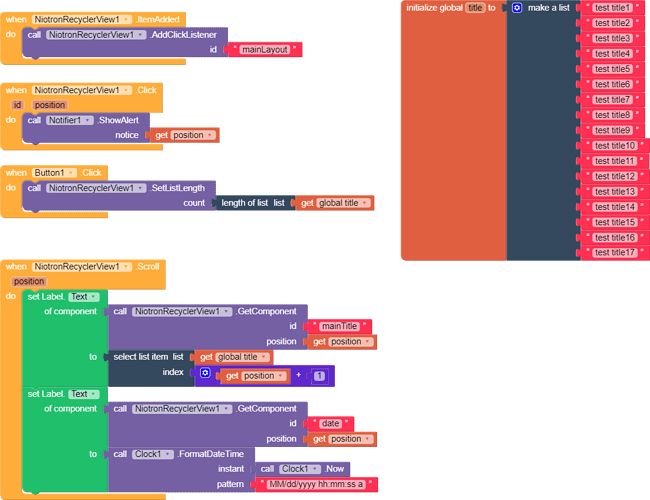
In parameter count you have to enter the length of your listview. Like how much long listview you want to create. If you are calling data from any database then use get length of list block in count parameter.
In item added event block you have to add click listener block where in parameter id you have to enter id(the unique id i had told you earlier to add in code for every component) of the component. For When that component click then click event of recyclerview will triggered.
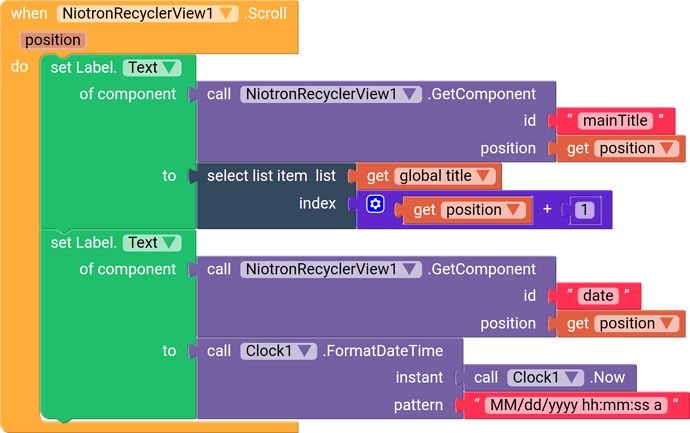
main part of the block to add value to your label or image
In this part you have to use when recylerview scroll event, in this event you have to use blocks from any component. Like I am using set label text, in component parameter I used block call recyclerview getcomponent in id parameter we have to enter the id of the label which we have entered in the code and in position parameter get the variable position from event the paste there.
Note: position return you value from 0 so if you are indexing item from list then must add 1 in index. And get component block works with label,image,textbox and some other important components.
At last I want to tell you that XML is the easy language like HTML so learn it if you can.
Apk and aia
Recyclerview (3).apk (4.7 MB)
Recyclerviewbykiller.aia (3.7 KB)
Tool : https://labs.udacity.com/android-visualizer/
Special thanks to @Krish and @tanishraj
It’s my first guide.
Soon i will post some designs with this component
Note: this component only work in compiled app not in companion.
Thank you ![]()


